Taming the Kitchen Counter Clutter

As featured in The Suburban

declutter

One of the biggest complaints my clients have is counter clutter.  The kitchen is the heart of the home and we tend to spend a lot of time there.  Unfortunately that doesn’t just apply to people. Paper and random household items gather there as well.

One of the easiest ways to tame that kitchen clutter is to designate areas to leave things until you have a moment to deal with them.  I get it, we all have busy lives and don’t always have the two minutes it takes to file that paid bill or put away that toy your child left on the table.  We need to work within our busy lives and use a system that makes sense for our lifestyle.

Take a look around the kitchen and take a mental tally of the most common items that seem to congregate there.  Toys? Paperwork? Office supplies? Homework?

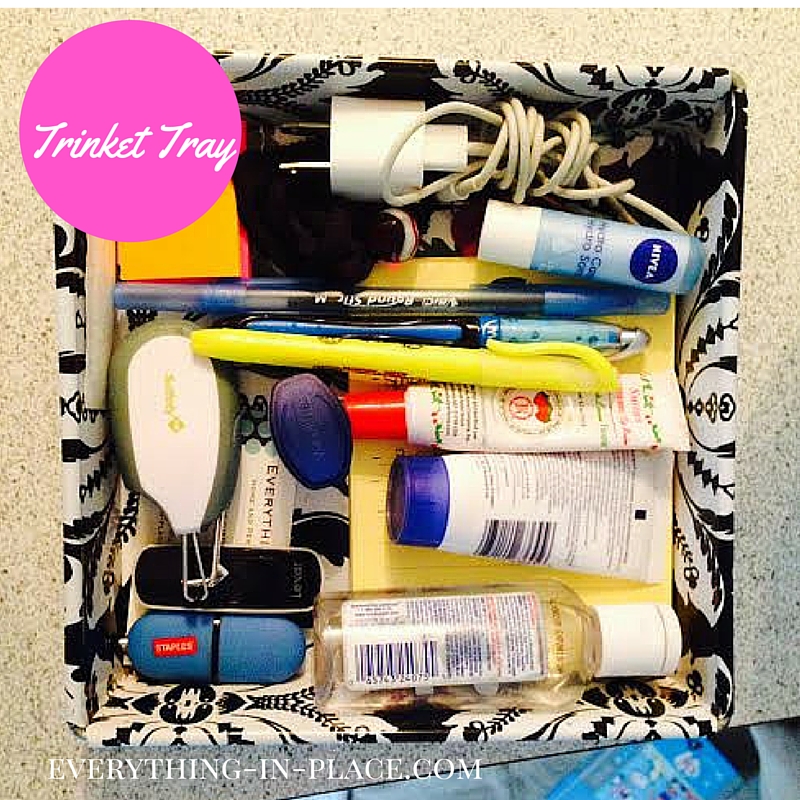
Now try to make a contained space or “zone” for each type of item. One of my favorite tricks is to have a small container or trinket tray on my counter.  It’s where you will keep a few pens, some paperclips, lip balm; any small items that you need access to in the kitchen but don’t want splayed all over the counter.

For larger items (like toys or clothes that have found a temporary home in your kitchen) try designating a basket that can be easily transported to other areas of your home.  A great solution can be a stair-basket. Throw the items into the basket at the bottom of the stairs and next time you have a few minutes bring the basket upstairs with you to put the items in their proper place.  

For paper try using a clear folder on the inside of a kitchen cabinet.  It’s a great place for the papers you need to have access to in the kitchen and a temporary home for the ones that need to be filed later.  You can also add a few labeled folders inside to differentiate the papers.

Happy Organizing!​

Maximize Your Closet Space

As featured in The Suburban

organized closet

Most of us don’t roll out of bed in the morning and stroll into our well-lit, meticulously organized, could-double-as-a-small-house, walk-in closet. Because of that I have developed some tricks and go-to products I use to maximize space.

Due to the ever changing seasons in our wonderful city chances are you have a much different wardrobe for the spring and summer months than you do for the fall and winter.  If you are lucky and have an extra closet that you can use to rotate your wardrobe by all means use it.  Try to declutter your clothes a few times a year and donate the ill-fitting and rarely worn items.  A great trick to see what you actually wear is to turn all the hangers around on the rod.  As you wear the item put it pack properly. At the end the year you can really get a sense of your go-to items.

If you only have one closet to work with I suggest trying to install a closet organizer. This can provided you with more hanging space and shelves than you already have.  They are reasonably priced and easy to install.  If the DIY thing is not for you try a “closet doubler”.  It’s basically a rod that hangs from your existing rod and.  .  .voila, double the hanging space!  Also try to rethink what you are hanging up. Items like tank tops, belts, scarves and jeans can often be hung together.  My favorite trick is combining a scarf hanger with shower curtain rings. So many items hung in the same amount of space!

One of the easiest swap outs is trading in your mismatched hangers for slimline ones.  They are significantly slimmer, and therefor take up less space than the average hanger and tend to be non-slip as well. No more shirts falling onto the floor!

The most important thing to remember is that the best way to have an organized closet is to routinely reevaluate your clothing needs and try not accumulate too much.

Happy Organizing!

Tame your Tupperware!

tupperware

Who among us has never searched desperately for a lid to a food storage container after you have already put leftovers in it? Yeah, that's what I thought.

Nearly every client's kitchen I have gone into has had an issue with their Tupperware (okay, I know it's not really Tupperware because Tupperware is a brand, but that is how I always refer to my "food storage containers"  and it's a lot easier this way, so from here on out we are going with Tupperware or containers. okay?)

Alright, back to organizing your Tupperware.  Like I said, this seems to be a nearly universal problem.  Unless you are getting rid of all of your existing containers and going to be all sleek (like buying just one fancy brand where the lid fits on all of the sizes and they stack neatly) you may want to keep reading.

My advice on organizing your Tupperware is much like organizing anything else. Let's run through my 5 Organizing Steps:

1. Like with like: Take all your containers out and sort them.   All the round ones together, all the square ones and all the rectangular ones.  Now make sure every container has a lid.

2. Declutter: all of those random, cracked, stained, stinky containers need to go.  The exception to this step is if you have an extra lid that fits another container hold onto it. Put it in a separate place for a bit.  Lids tend to crack or get lost and then you can just go to your  stock to replace it.

variera lid organizer

3. Put it Back:  Now, for this step it's important that you are realistic about both the space you have to store these containers and the amount of containers you have. Don't try to fit 100 of them into a drawer meant for cutlery. Either pare down the amount you have or find a new home for them in the kitchen.  I am lucky enough to have pull-out shelve/drawer things, so that's what I use.  When you put the Tupperware back  stack all the round ones together from largest to smallest (without the lids), same for the other shapes.  Then I store the lids next to them.  I love using a pot-lid organizer for this.  I just switched to the Variera from IKEA because you have some flexibility with the spacing, but really, any lid organizer will do.

4. Label it: this is usually my 4th step, but it doesn't really apply here.  Unless you really want to, there is no need to label it.  It's Tupperware, you know what it is.

5. Live with it: Make sure this really works for you.  Not every organizing system works for everyone.  If it's not working for you try to figure out what isn't working.  If you can't, take a picture and send it to me.  I'll try to help you out! Don't be afraid to change it up!