How A Professional Organizer Tidies Up Under The Sink

As seen in Huffington Post

organizer sink

My last post tackled starting small with your organizing as a way to motivate you onto the bigger projects.  I focused on steps you can use to tackle the often forgotten about space under the sink, but really you can apply those steps to other spaces that need a bit of love.  Since one of the biggest questions I get is “How do you keep your home organized” I thought you might appreciate a look into my home. Particularly under my sink and how I deal with it when it is no longer working.

The space wasn’t a disaster but definitely needed an update.  It’s always a good plan to identify what your problem is before going in to fix it.  My two biggest issues were that: 1. We use a lot of washcloths to wipe kid’s face and hands and the dirty ones kept congregating on the counter until I got fed up enough to bring them to the laundry room.  2. The stackable bins I was using wouldn’t stay stacked and what I had in them wasn’t accessible enough for me.

The third issue was that no one other than me was really maintaining my system.  What was intuitive to me wasn’t as straightforward to my husband and my kids couldn’t grab a washcloth or hand towel with turning everything upside down.

I had a few minutes one day and decided to deal with this space.  So out everything came and the inside got a thorough wipe down.  Once all the products came out and they were sorted I took inventory of what I really needed to keep there.  I have to admit, since I had already pared down what was stored there some time ago the list wasn’t very long.  My biggest challenges was really getting everything back under the sink in a way that A. made sense for how I used it and B. was going to be maintained by others.

With a husband, a 5 year old and 3 year old this was no small feat.  Clearly what I was doing before wasn’t working so I decided to keep it simple.  Very simple.  The most used items needed to be right in front and it needed to be SUPER clear where things went.

The recycling bin was a non-movable.  It’s the most convenient and out of sight spot for us to have it.  Unfortunately that means I lose about half my space.  Saving the earth takes sacrifice!  I picked up a small plastic shelf from the dollar store and grabbed some bins that both fit what I needed to store and could go in the space the shelf allowed for.

organized kitchen sink

My under the sink essentials are washcloths, kitchen towels, dish sponges, clothes to clean the counter and dishwasher detergent (because we seriously run that thing once a day!) I also needed a convenient spot to put all the dirty cloths and towels so they wouldn’t end up on the counter.  Since my kids can’t read yet, I realized that not only did I have to label them but they needed to be in different containers so I could identify them to my children.  Oh, you need a washcloth? That’s in the clear bin.  You took my hand towel to clean the water you spilled all over the floor because your toys need a bath? No problem, just throw it in the green bucket.

So back everything went into it’s clearly designated space.  I also store a few items that only I really use behind the shelf.  Special cleaner for the stovetop, white vinegar and the cleaning concentrate I use to make up the spray I use on the counters.  You’ll notice I don’t really store cleaning products under the sink.  Over the years I have really pared down what I use in the kitchen.  I only use dish soap and a spray for the counters and they both stay up top in a tray next to the sink.   The amount of times my children literally lick food off the table has made me very careful about what I use to clean.

life hack organized

The last part of this space is the inside of the doors.  I didn’t change anything around this time but I do use them to hang rubber gloves (which I wear only if my nails are done which unfortunately is very infrequently, they usually get nabbed by my three year old when she plays dress-up) and a place for the plastic bags that we accumulate.

I did this under the sink update a little over two months ago and haven’t had an issue since.  Yes the occasional washcloth or dirty towel still finds it’s way to the counter but that’s just life.  It really is the small changes that make a big difference. When you see how much positive can come out of a few small changes it can be very motivating to tackle some slightly bigger projects.

Happy Organizing!  If you want to send me a peek under your kitchen sink get in touch here.


Wrangle Your Receipts in 2016

As seen on Huffington Post

Every time you go shopping, do groceries and pay for parking your wallet tends to increase in size.  Unfortunately this is not because it’s getting filled with cash, it’s those pesky paper receipts.  You finally get so fed up that you rip them all out of there and either throw them out or shove them into a drawer somewhere.  But what if there was a better way?  Most of us tend to have some kind of filing system in place for the important paperwork but receipts from everyday purchases tend to get overlooked. Well, those days are over, so let’s push those papers into the spotlight today.

Do I need to keep this?

First of all, I am not an accountant and everyone’s situation is different so check with your provincial/federal guidelines for the important stuff that you may need for tax purposes.   That’s a whole other blog post and we’re going to focus on the easy stuff today.

Gas, restaurant and grocery receipts don’t need a very long life in your wallet, or anywhere for that matter.  As long as you’re a person and not a business they can go pretty quick.  The old rule of thumb used to be to keep them until you reconcile them with your monthly bank statement and then shred them.  Most of us don’t get statements in the mail anymore, so take a few minutes every few days, or at the end of the week to log on to your on-line banking and check your transactions.  If you keep a spreadsheet with a monthly budget be sure to enter them in and then they can go.  A lot of on-line banking will let you generate pretty pie charts to see where your money is going, so even the monthly budget spreadsheet may not be necessary.

The only other thing I will say about grocery receipts is that sometimes food spoils even though it’s not expired or you got a bad apple or something and and you want a refund.  If that happens a lot to you, by all means, hold onto it for a few extra days.

Withdrawal slips and other bank transactions tend to fall into the same rules as gas and grocery.  Make sure it makes sense with your statement (be it paper or electronic) and then shred it.  Except for taking out cash (and I’m sure they’ll figure that one out eventually) most banking transactions can be completed on-line, so consider making the leap over if you haven’t already.  Anytime you can go paperless it’s a good thing and a lot of banks let you deposit cheques through an app.  No paper records to keep and all the details are at your disposal.  Can’t argue with that!

Clothes, shoes and electronics.  Anything with a guarantee or warrantee or that can possibly break you need to hang on to until that guarantee expires.  Same thing applies to items you may need to return.  Honestly, most of the time you couldn’t pay me enough to make my kids try on clothes in the store, I would much rather buy 1 or 2 sizes that I think will fit them and return what doesn’t work.  Once you have worn the clothes or shoes you generally can’t return them anyway so keeping the receipt is pointless.  Hang onto it for a few weeks (assuming you began using the product) to ensure it’s not defective and then say goodbye to the receipt.

When should I do this?

If you’re short on time to go through your receipts, think about using some of that dead-time.  Waiting at the Dr’s office, the long line at the grocery store, watching a mindless tv show, parked in the car waiting for your friend that never shows up on time.  All great opportunities to take a minute to go through your wallet.  I like to keep a little plastic baggie in my purse for the receipts that need to be disposed of but I don’t want to throw in the garbage while I’m out.

Where should I store it?

With all that being said if you really like to keep these papers for longer but don’t have the space, or just don’t want the clutter, consider using an app.  I like using Wave (no affiliation), but there are tons of them out there.  These apps allow you to take a picture of the receipt (even the super long ones), categorize and edit them with the store name and the amount and then save them on-line.  This also helps if you want to see where your money is going or if you need to generate a report for your accountant.

But Allison, you now say, what do I do with all the receipts I am keeping? They can’t just hang out in my wallet and I don’t want to put them into my filing system! Fear not readers, the answer is as simple as a coupon-sized expanding folder. These things are small, compact, have different sections and can easily be labelled to suit your needs.  You can pick them up at an office supply store or a lot of times, the Dollarstore .  My favorite category to make is the “possibly to return”, it’s like a holding zone for the things I’m not sure about.  Just make sure to go though it every few weeks and declutter.

Happy Organizing!​

Tame your Tupperware!

tupperware

Who among us has never searched desperately for a lid to a food storage container after you have already put leftovers in it? Yeah, that's what I thought.

Nearly every client's kitchen I have gone into has had an issue with their Tupperware (okay, I know it's not really Tupperware because Tupperware is a brand, but that is how I always refer to my "food storage containers"  and it's a lot easier this way, so from here on out we are going with Tupperware or containers. okay?)

Alright, back to organizing your Tupperware.  Like I said, this seems to be a nearly universal problem.  Unless you are getting rid of all of your existing containers and going to be all sleek (like buying just one fancy brand where the lid fits on all of the sizes and they stack neatly) you may want to keep reading.

My advice on organizing your Tupperware is much like organizing anything else. Let's run through my 5 Organizing Steps:

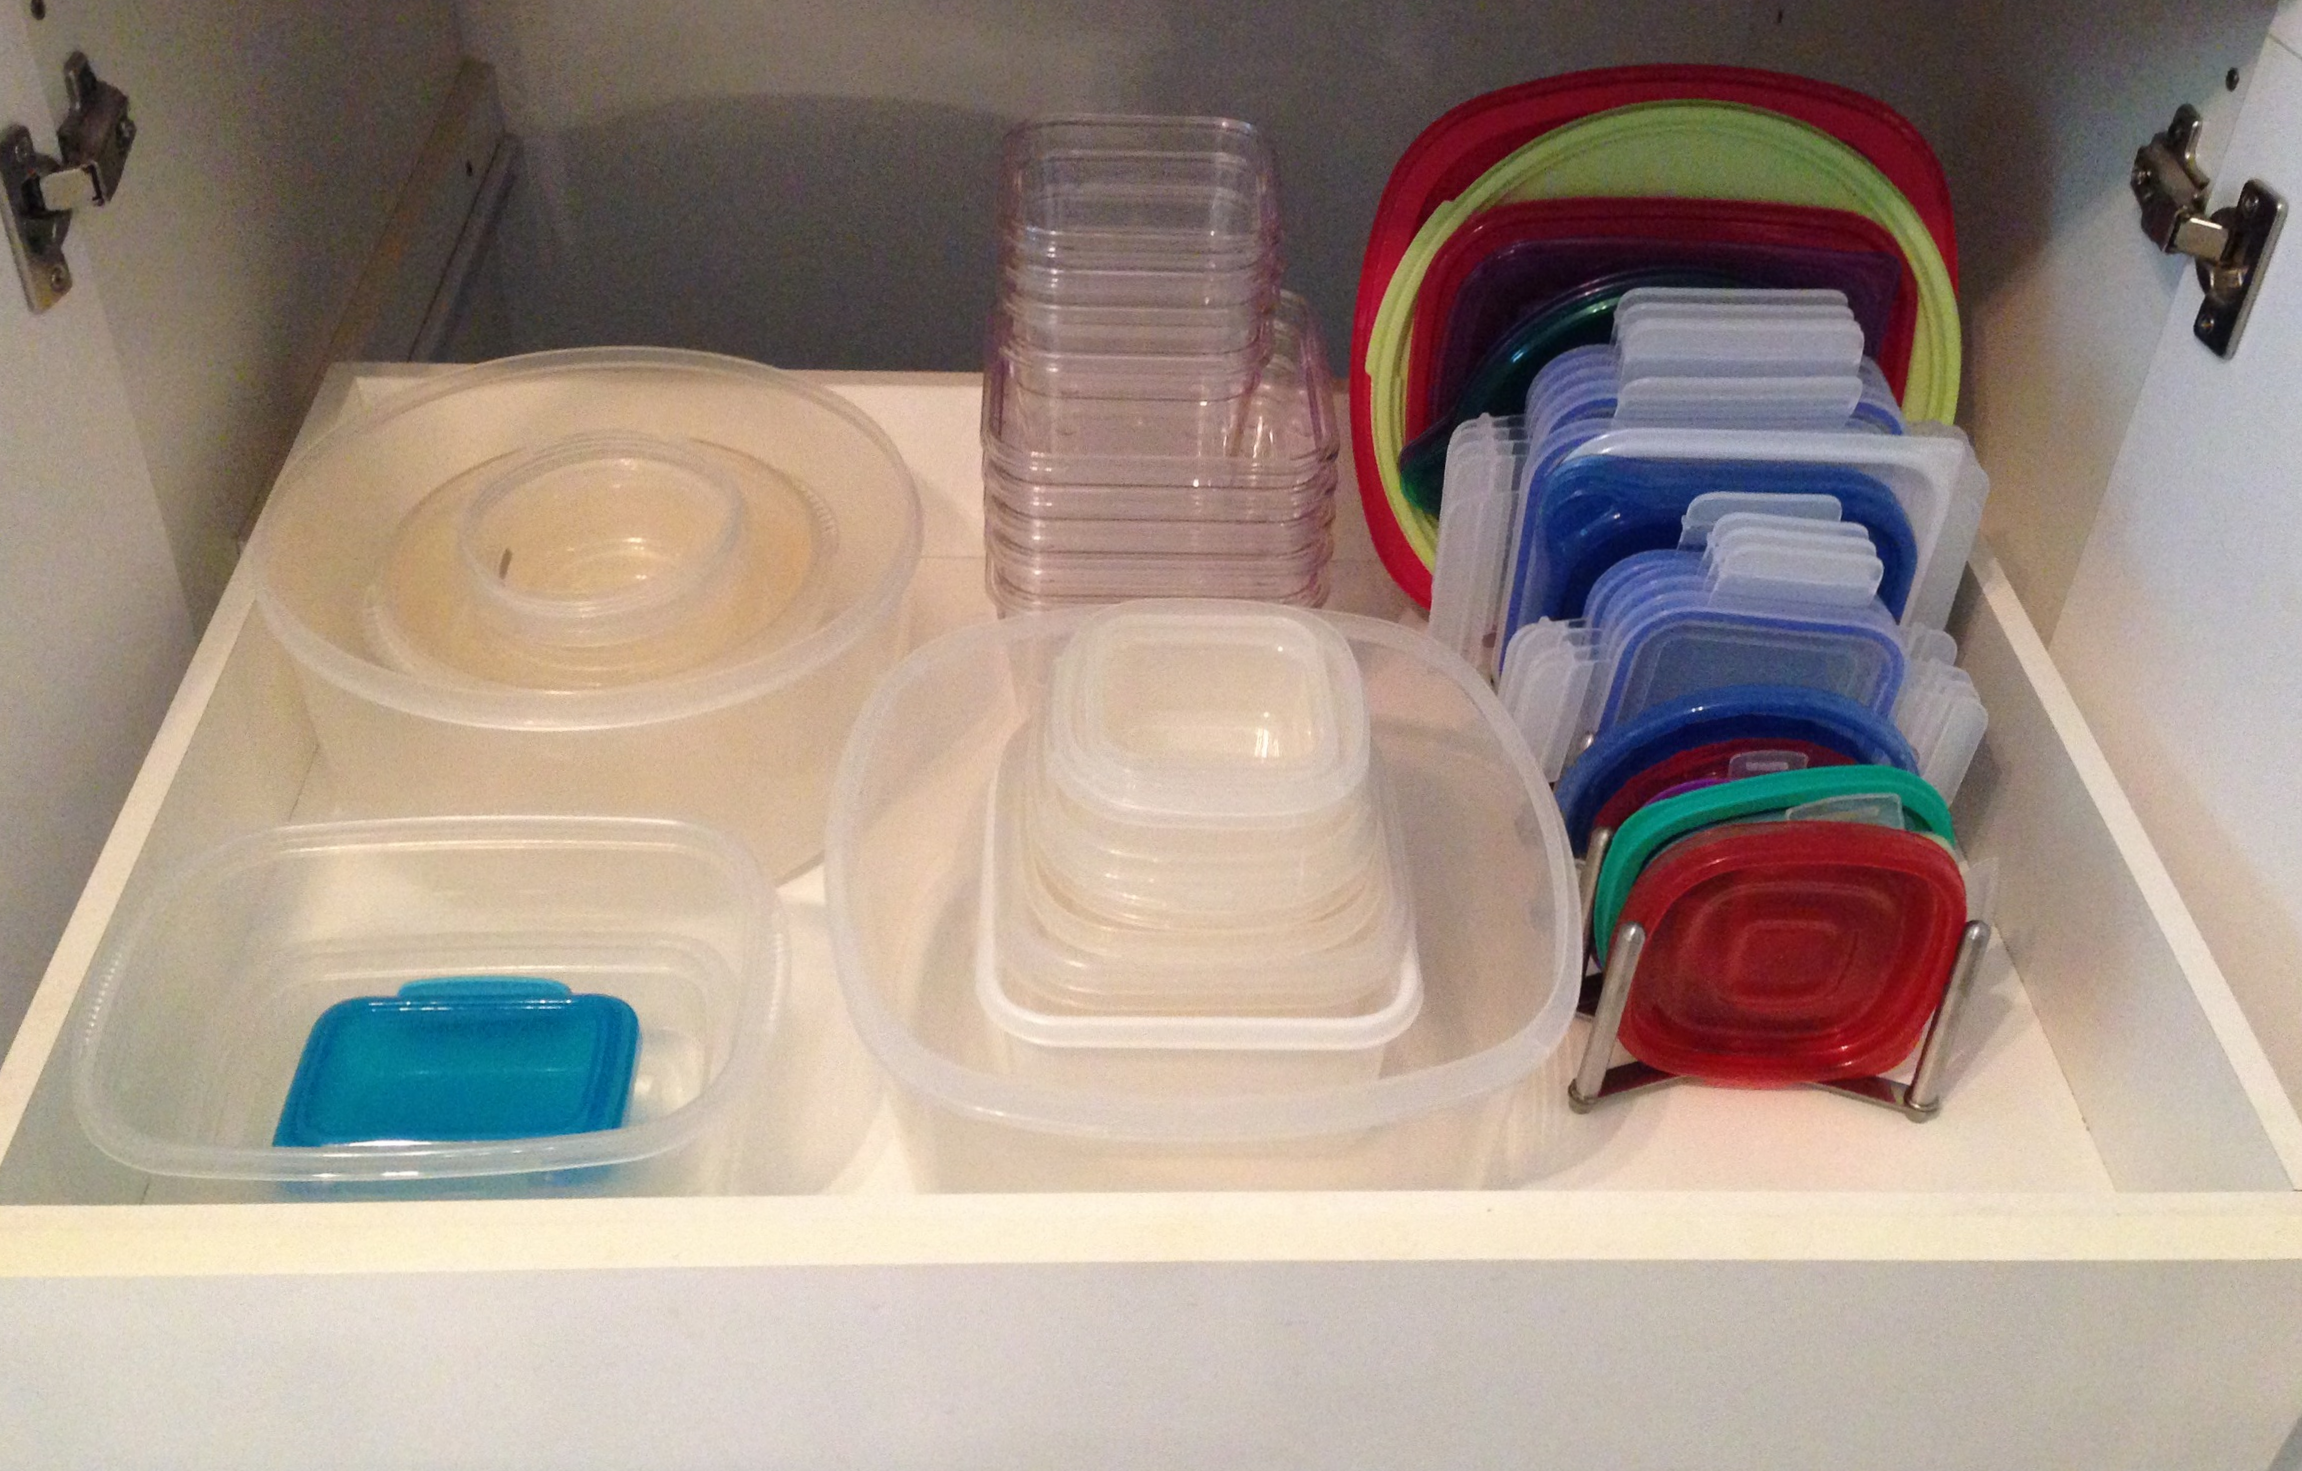
1. Like with like: Take all your containers out and sort them.   All the round ones together, all the square ones and all the rectangular ones.  Now make sure every container has a lid.

2. Declutter: all of those random, cracked, stained, stinky containers need to go.  The exception to this step is if you have an extra lid that fits another container hold onto it. Put it in a separate place for a bit.  Lids tend to crack or get lost and then you can just go to your  stock to replace it.

variera lid organizer

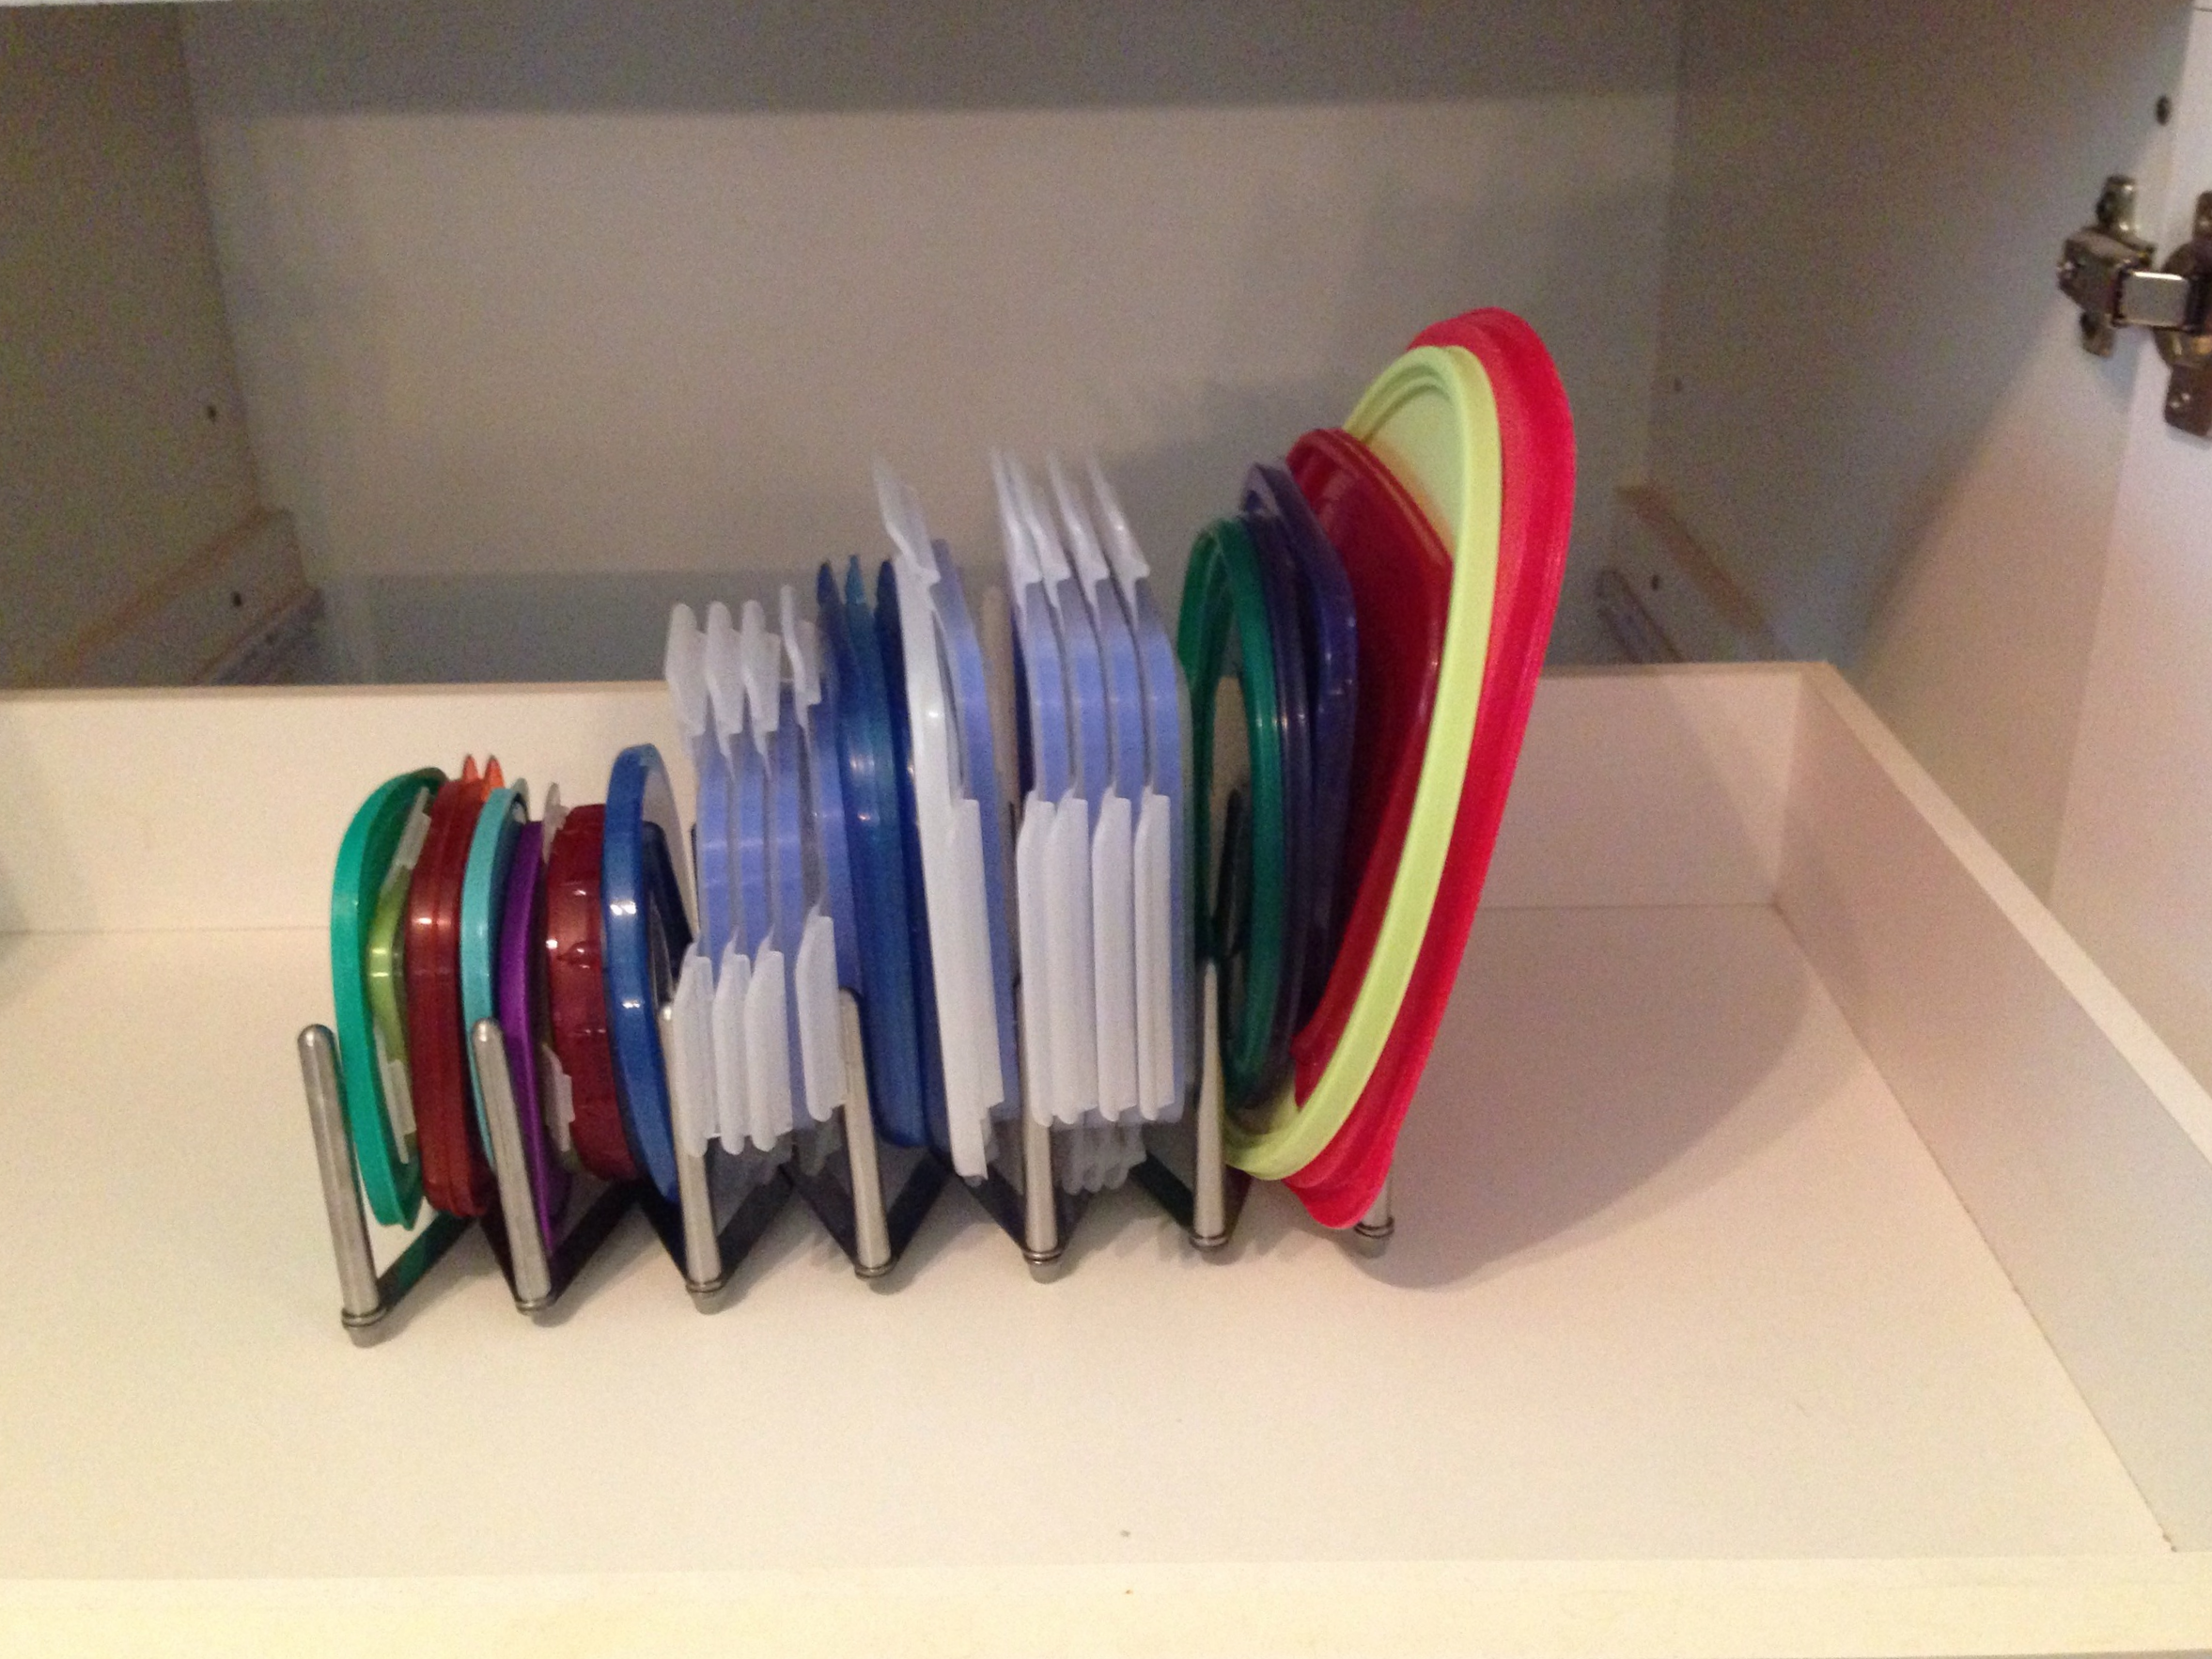
3. Put it Back:  Now, for this step it's important that you are realistic about both the space you have to store these containers and the amount of containers you have. Don't try to fit 100 of them into a drawer meant for cutlery. Either pare down the amount you have or find a new home for them in the kitchen.  I am lucky enough to have pull-out shelve/drawer things, so that's what I use.  When you put the Tupperware back  stack all the round ones together from largest to smallest (without the lids), same for the other shapes.  Then I store the lids next to them.  I love using a pot-lid organizer for this.  I just switched to the Variera from IKEA because you have some flexibility with the spacing, but really, any lid organizer will do.

4. Label it: this is usually my 4th step, but it doesn't really apply here.  Unless you really want to, there is no need to label it.  It's Tupperware, you know what it is.

5. Live with it: Make sure this really works for you.  Not every organizing system works for everyone.  If it's not working for you try to figure out what isn't working.  If you can't, take a picture and send it to me.  I'll try to help you out! Don't be afraid to change it up!

Your laundry room can be pretty too!

I am a huge proponent of the concept of "store it where you use it" and your laundry supplies are a perfect example.

 Try  to have all of your laundry supplies within reach when you need them.  For any products you frequently use make sure they are set up in the most efficient way possible. For instance, try tearing the top off of the box of fabric softener sheets and using a larger detergent container with a spout.

Easy to clean plastic bins with labels are a great way to group together similar products. A peel'n'stick shelf liner  with a cool pattern can go a long way towards achieving the look you want.  Personally, I love mixing patterns with complimenting colors. 

Laundry Room Shelving

The shelf liner is a great double duty product. It can cover up the ugly underneath and create an easily wipable surface.  If you look closely I also put some shelf liner directly on some of the products for a cleaner look . Just be sure to not cover any safety information!  

You will be surprised how just a few small changes will simplify your daily chores!