

Why does paper clutter gravitate towards the kitchen? I know its not just in my home, I see it with my clients all the time. Either there is some weird gravitational force that pulls all the junk mail, flyers and random papers into the kitchen and spreads them out onto the counters OR we just don't have a great system to deal with them. I'm going to go with the latter!
A few years ago I bought this great transparent folder that sticks onto the wall. It is from the Martha Stewart collection that was available at Staples/Bureau en Gros. I immediately put it on the inside of a kitchen cupboard door. I had instant success! It is a great place for us to keep the random papers that we need handy. No more paper mess on the counters. . yay!!! Then the overflow happened. The folder got so full that I wasn't able to close the cupboard door. There was way too much in there and I could no longer find what I needed. This clearly wasn't working for us anymore. As a Professional Organizer I am all about adapting systems to changing needs and lifestyle, so I clearly needed another solution. For a while that meant I was piling papers on top of our microwave. This drove my husband crazy because every time I needed to find a paper I would take the whole pile down, sift through it and leave the papers on the counter. When my husband would go to clean the kitchen he would ask "what do you want me to do with these papers?". I would usually respond by snapping at him to leave them be and I would deal with them later, then inevitably get upset when he didn't clean the kitchen properly because he left the papers all over the counter!
I obviously needed a solution to this; I needed another folder on the wall. One would be for reference papers I needed to keep handy in the kitchen (i.e. my secondary home office!) and another would be for all the paperwork whose temporary home would be in the kitchen and would need to be filed later.
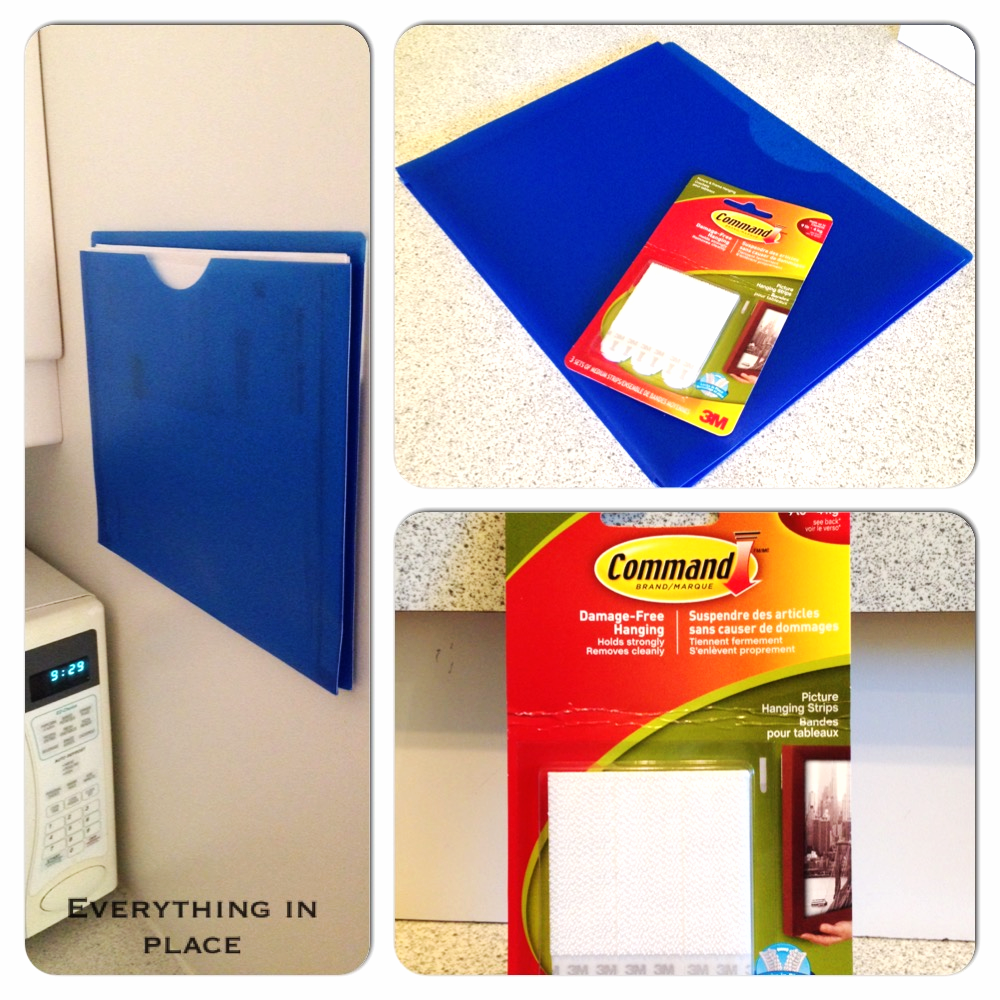
I searched for another of those great wall folders, but sadly the product line was discontinued. Time for a little DIY organizing action!
I bought some transparent plastic folders (Staples Poly Vertical Filing Jackets) and Command Picture Hanging Strips (two strips that kind of click together, like Velcro) and went to work. I found an out of the way spot in the kitchen where I wouldn't see the folder when I walked in. I attached the strips to the back of the folder and stuck it to the wall. Now I can use the folder for temporary filing and then take it off the wall when it's full to file it in my actual office in the basement. Problem solved!


